Overview
Sticky Notes is Windows 11’s lightweight note-taking app. This guide covers opening and using it, where its data is stored, and how to back up, restore, and sync your notes so you never lose them.
Back up and restore your Sticky Notes.
Key Takeaways
- Sticky Notes stores data in a plum.sqlite database file.
- Sign in with a Microsoft account to sync notes across devices.
- Back up by copying the LocalState folder.
- Restore by replacing that folder while the app is closed.
Open and Use Sticky Notes
1. Open the Start menu, search for "Sticky Notes", and launch it.
2. Optionally sign in with your Microsoft account to enable sync.
3. Click the + button to create a new note and start typing.
4. Use the toolbar for bold, italics, bullets, and images.
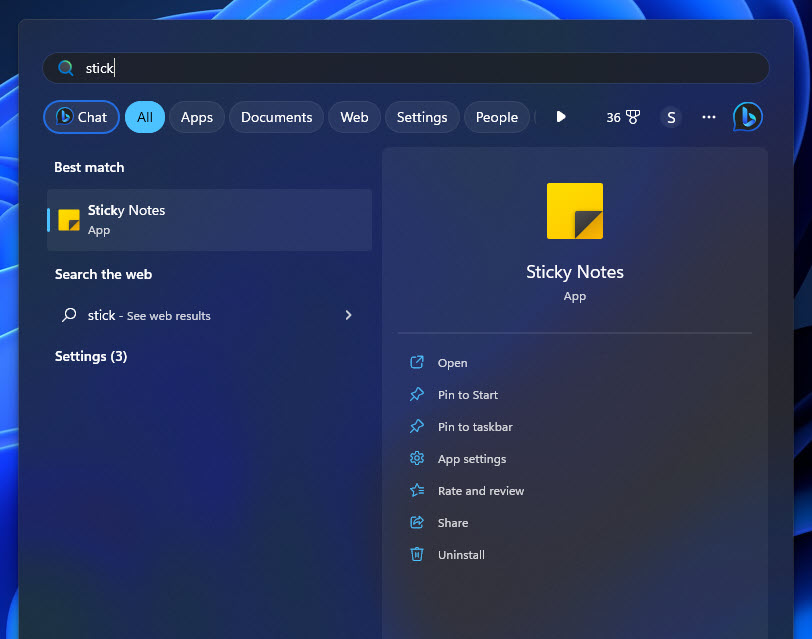
Open Sticky Notes from the Start menu.
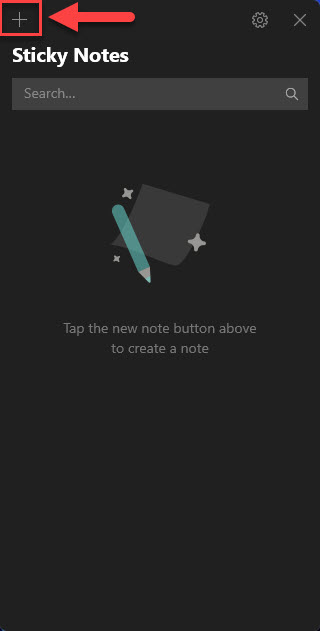
Create a new sticky note.
Where Sticky Notes Are Stored
Notes live in a SQLite database inside your user profile:
1. Press Windows + R, paste the path below, and press Enter:
2. %LocalAppData%\Packages\Microsoft.MicrosoftStickyNotes_8wekyb3d8bbwe\LocalState
3. The notes are stored in plum.sqlite within that folder.
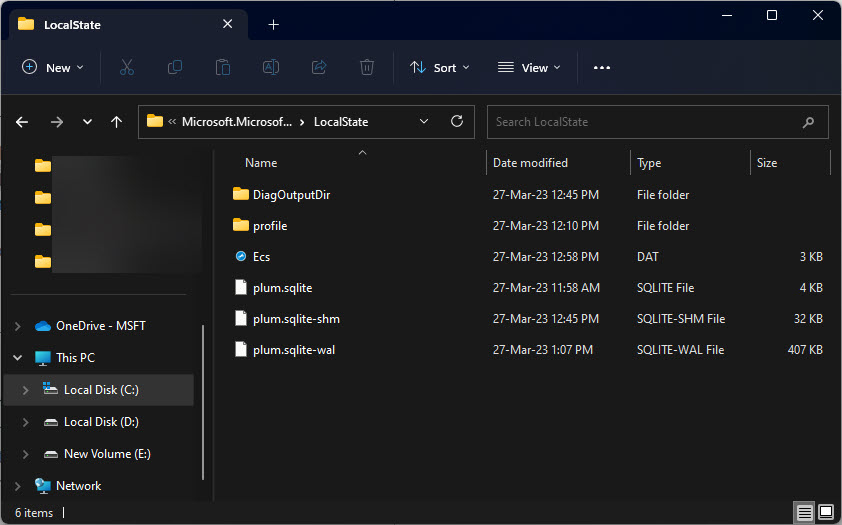
Sticky Notes are stored in the plum.sqlite database.
Back Up Sticky Notes
1. Close the Sticky Notes app completely.
2. Open the LocalState folder (path above).
3. Copy the entire LocalState folder (or at least plum.sqlite) to a safe backup location.
Note: Always close Sticky Notes before copying plum.sqlite, or the backup may be incomplete.
Restore Sticky Notes
1. Close the Sticky Notes app.
2. Open the LocalState folder on the target PC.
3. Replace the existing files with your backed-up copy (especially plum.sqlite).
4. Reopen Sticky Notes — your notes should reappear.
Sync Across Devices
1. Open Sticky Notes and click the Settings gear.
2. Sign in with your Microsoft account.
3. Notes now sync automatically to other devices and to Outlook/OneNote where supported.
Troubleshooting
Problem: Restored notes don’t appear.
Solution: Make sure the app was fully closed before replacing files, and that you copied plum.sqlite into the correct LocalState path.
Problem: Sync isn’t working.
Solution: Confirm you’re signed in with the same Microsoft account and have an internet connection; sign out and back in to refresh.
Problem: Notes disappeared after an update.
Solution: Restore from your backup; check whether you’re signed into a different account than before.
Problem: Can’t find the LocalState folder.
Solution: Enable hidden items in File Explorer, and paste the %LocalAppData%… path directly into the address bar.
Conclusion
Sticky Notes is simple but its data is easy to protect. Back up the plum.sqlite database (with the app closed), sign in to sync across devices, and you can restore your notes on any PC in seconds.
</w:pBdr><w:spacing w:before="220" w:after="40"/></w:pPr><w:r><w:rPr><w:b/><w:bCs/><w:color w:val="0B5394"/><w:sz w:val="21"/><w:szCs w:val="21"/><w:rFonts w:ascii="Calibri" w:cs="Calibri" w:eastAsia="Calibri" w:hAnsi="Calibri"/></w:rPr><w:t xml:space="preserve">About TechHub
This guide is part of the TechHub Knowledge Base. For more step-by-step IT guides and support, visit techhub.com.lk.