Overview
Wi-Fi එක 2.4 GHz සහ 5 GHz bands දෙකේ run වෙනවා — ඒ දෙකෙන් range සහ speed අතර trade-off එකක් තියෙනවා. බලාපොරොත්තු වුණ speed එක හෝ coverage එක නැත්නම්, band එක switch කරන එක උදව් වෙන්න පුළුවන්. මේ guide එකෙන් වෙනස පැහැදිලි කරලා, 5 GHz support එක check කරන ආකාරය, සහ Windows/router/Mac වල band එක වෙනස් කරන ආකාරය පෙන්නනවා.
හරි Wi-Fi band එක තෝරගැනීමෙන් speed සහ range balance වෙනවා.
Key Takeaways
- 2.4 GHz වැඩි දුරක්, walls හරහා යනවා, ඒත් slow සහ congested.
- 5 GHz වේගවත්, interference අඩුයි, ඒත් range අඩුයි.
- 5 GHz support එක check කරන්න: netsh wlan show drivers.
- Wi-Fi adapter එකේ advanced settings වල preferred band එකක් set කරන්න, නැත්නම් router එකේ bands split කරන්න.
2.4 GHz vs 5 GHz
- 2.4 GHz — වැඩි range, walls හරහා හොඳ, ඒත් slow සහ crowded (microwaves, Bluetooth interfere වෙනවා).
- 5 GHz — ගොඩක් වේගවත්, interference අඩු, ඒත් range අඩු, walls හරහා weak.
- Speed වලට router එකට ළඟ 5 GHz; distance/obstacles වලට 2.4 GHz පාවිච්චි කරන්න.
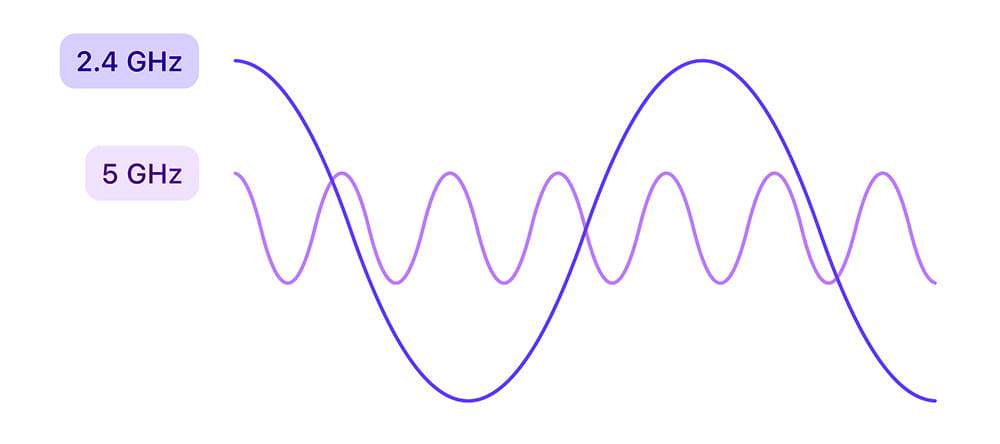
2.4 GHz වල දිග wavelengths (වැඩි range); 5 GHz වේගවත්.
ඔබේ PC එකට 5 GHz Support ද කියලා බලන්න
1. Command Prompt open කරන්න.
2. Run: netsh wlan show drivers
3. "Radio types supported" බලන්න — 802.11a/ac/ax (හෝ 5 GHz මත n) list වෙනවා නම්, ඔබේ adapter එක 5 GHz support කරනවා.
Windows එකේ Band එක වෙනස් කරන්න
1. Start එක right-click කරලා Device Manager open කරන්න.
2. Network adapters expand කරලා, Wi-Fi adapter එක right-click කරලා Properties තෝරන්න.
3. Advanced tab එකේ "Preferred Band" (හෝ "Band") හොයන්න.
4. 2.4 GHz හෝ 5 GHz (හෝ "Prefer 5 GHz") තෝරලා OK click කරන්න.
Router එකේ Band එක වෙනස් කරන්න
1. Browser එකක router admin page එක open කරන්න.
2. 2.4 GHz සහ 5 GHz networks වලට wireless settings හොයන්න.
3. එක එක band එකට වෙනම SSID (network name) එකක් දෙන්න, එතකොට device එකක් කොයි එකට join වෙනවද තෝරන්න පුළුවන්.
4. Save කරලා, ඕන band එකට device එක reconnect කරන්න.
Mac එකක Band එක වෙනස් කරන්න
1. Router එකේ, 2.4 GHz සහ 5 GHz වලට වෙනස් SSIDs set කරන්න.
2. Mac එකේ, Wi-Fi settings open කරලා ඕන band එකේ SSID එකට connect වෙන්න.
3. නැත්නම් System Settings > Wi-Fi > Advanced එකේ preferred network එක prioritise කරන්න.
Tip: එක එක band එකට තමන්ගේ SSID එක දෙන එක තමයි device එකක් කොයි band එකක් use කරනවද control කරන්න ලේසිම ක්රමය.
Troubleshooting
Problem: Preferred Band option එක නෑ.
Solution: ඔබේ adapter එක 5 GHz support නොකරන්න පුළුවන්, නැත්නම් driver එකේ setting එක නෑ. Wi-Fi driver එක update කරන්න, නැත්නම් router එකේ SSIDs split කරන්න.
Problem: Adapter එක 5 GHz list කරන්නේ නෑ.
Solution: Adapter එක 2.4 GHz only. 5 GHz එකතු කරන්න dual-band USB Wi-Fi adapter එකක් පාවිච්චි කරන්න.
Problem: දුරදී 5 GHz drop වෙනවා.
Solution: ඒක normal — 5 GHz range අඩුයි. ළං වෙන්න, mesh node එකක් දාන්න, නැත්නම් දුර rooms වලට 2.4 GHz පාවිච්චි කරන්න.
Problem: Device එක වැරදි band එකට join වෙනවා.
Solution: Band එකට එකක් බැගින් වෙනස් SSIDs පාවිච්චි කරලා ඕන එකට connect වෙන්න; ඕන නම් අනිත් network එක forget කරන්න.
Conclusion
Band එක ඔබේ අවශ්යතාවට ගළපන්න: ළඟදී speed වලට 5 GHz, range වලට 2.4 GHz. Adapter එකේ advanced settings වල preferred band එකක් set කරන්න, නැත්නම් full control වලට router එකේ bands වෙනස් SSIDs වලට split කරන්න.
About TechHub
මේ guide එක TechHub Knowledge Base එකේ කොටසක්. තව step-by-step IT guides සහ support වලට techhub.com.lk එකට යන්න.