Overview
Windows 11 වලට TPM 2.0 සහ Secure Boot දෙකම ඕන. බොහෝ PC වල මේ features support කරනවා, නමුත් firmware එකේදී disable කරලා තමයි ship වෙන්නේ. මේ guide එකෙන් පෙන්නනවා ඔයාගේ PC එකේ මේ feature එකින් එක තියෙනවද කියලා check කරන හැටිත්, Windows 11 install හෝ upgrade කරන්න ඒවා enable කරන හැටිත්.
Windows 11 requirements සම්පූර්ණ කරන්න Secure Boot සහ TPM 2.0 check කරලා enable කරන්න.
Key Takeaways
- TPM 2.0 කියන්නේ security chip එකක්; Secure Boot එකෙන් trust නොකරන boot code එක block කරනවා.
- TPM එක tpm.msc එකෙනුත්, Secure Boot එක msinfo32 එකෙනුත් check කරන්න.
- මේ දෙකම enable කරන්නේ Windows එකේ නෙවෙයි, ඔයාගේ UEFI/BIOS firmware එකේ.
- බොහෝ system වල මේවා තියෙනවා නමුත් default විදිහට disable කරලා — ඒවා on කරන එකම ඇති බොහෝ වෙලාවට.
What Are TPM 2.0 and Secure Boot?
- TPM 2.0 (Trusted Platform Module) — keys secure විදිහට store කරන chip එකක්, BitLocker සහ Windows Hello වගේ feature වලට support දෙන.
- Secure Boot — startup එකේදී trust කරන, signed software විතරක් load වෙන්න ඉඩ දෙන UEFI feature එකක්, boot-level malware වලින් ආරක්ෂාව දෙනවා.
Check Secure Boot Availability
1. Windows key + R press කරලා, msinfo32 කියලා type කරලා, Enter press කරන්න.
2. System Information එකේදී "Secure Boot State" (On, Off, හෝ Unsupported) සහ "BIOS Mode" (UEFI විය යුතුයි) බලන්න.
3. Off කියලා තිබුණත් mode එක UEFI නම්, ඔයාට firmware එකේදී ඒක enable කරන්න පුළුවන්.
Enable Secure Boot in Firmware
1. Restart කරලා UEFI/BIOS එකට යන්න (බොහෝ විට boot වෙද්දී Del, F2, F10, හෝ Esc).
2. Secure Boot එක හොයාගන්න (බොහෝ විට Boot හෝ Security යටතේ).
3. ඒක Enabled කරන්න. සමහරවිට OS type එක "Windows UEFI mode" කරන්නත්, Secure Boot keys clear/restore කරන්නත් වෙයි.
4. Save කරලා exit වෙන්න, ඊට පස්සේ msinfo32 එකෙන් නැවත check කරන්න.
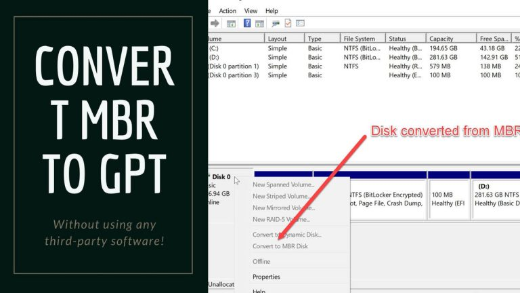
Note: Secure Boot වලට UEFI mode (GPT disk) ඕන. ඔයාගේ system එක Legacy/CSM mode (MBR) එකේ නම්, UEFI වලට මාරු වෙන්න disk එක MBR2GPT එකෙන් convert කරන්න වෙයි.
Check for TPM 2.0
1. Windows key + R press කරලා, tpm.msc කියලා type කරලා, Enter press කරන්න.
2. Status එක කියවන්න: TPM එක ready ද කියලත්, එහි Specification Version (2.0 විය යුතුයි) එකත් පෙන්නනවා.
3. "Compatible TPM cannot be found" කියලා තිබුණොත්, firmware එකේදී ඒක enable කරන්න.
Enable TPM 2.0 in Firmware
1. Restart කරලා UEFI/BIOS එකට යන්න.
2. TPM setting එක හොයාගන්න — ඒක TPM, PTT (Intel Platform Trust Technology), හෝ fTPM (AMD) කියලා label කරලා තියෙන්න පුළුවන්.
3. ඒක Enabled කරන්න.
4. Save කරලා exit වෙන්න, ඊට පස්සේ tpm.msc එකෙන් නැවත check කරන්න.
Troubleshooting
Problem: Secure Boot State එක Unsupported කියනවා.
Solution: ඔයාගේ system එක බොහෝ විට Legacy/CSM (MBR) mode එකේ. disk එක GPT වලට convert කරලා (mbr2gpt), firmware එක UEFI වලට මාරු කරලා, ඊට පස්සේ Secure Boot enable කරන්න.
Problem: tpm.msc එකෙන් TPM එකක් හම්බ වෙන්නේ නෑ.
Solution: firmware එකේ TPM/PTT/fTPM enable කරන්න. නවීන CPU බොහෝමයක discrete chip එකක් නැතත් firmware TPM එකක් තියෙනවා.
Problem: BIOS එකේ settings හොයාගන්න බෑ.
Solution: නම් manufacturer අනුව වෙනස් වෙනවා. TPM (PTT/fTPM) සහ Secure Boot location වලට ඔයාගේ motherboard/laptop manual එක බලන්න.
Problem: Windows තාම කියනවා PC එක unsupported කියලා.
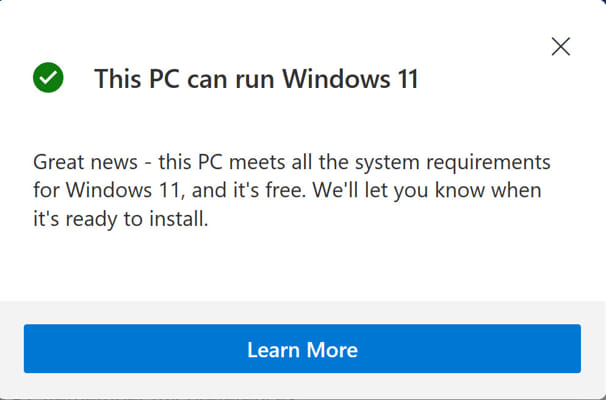
Solution: feature දෙකම enable කරලා restart කරලා, requirements ඔක්කොම සම්පූර්ණයි කියලා තහවුරු කරගන්න PC Health Check app එක run කරන්න.
Conclusion
TPM 2.0 සහ Secure Boot check කරලා enable කරන එක බොහෝ විට ඉක්මන් firmware වෙනසක්. tpm.msc සහ msinfo32 එකෙන් verify කරලා, UEFI එකේ එකින් එක on කරන්න, ඊට පස්සේ ඔයාගේ PC එක Windows 11 security requirements සම්පූර්ණ කරන්න ඕන.
About TechHub
මේ guide එක TechHub Knowledge Base එකේ කොටසක්. තව step-by-step IT guides සහ support වලට techhub.com.lk එකට යන්න.