Overview
Windows Update එක සාමාන්යයෙන් driver updates auto-matically install කරනවා. ඒක පහසුයි, නමුත් සමහර වෙලාවට automatic driver එකක් හොඳට වැඩ කරන driver එකක් වෙනුවට bug තියෙන version එකක් දානවා, නැත්නම් ඔයාට අවශ්ය specific driver එකක් overwrite කරනවා. මේ guide එකෙන් Windows ඔයාගේ drivers auto-matically update කරන එක නවත්තන ක්රම තුනක් සහ ඒ වෙනුවට drivers manually install කරන්නේ කොහොමද කියලා පෙන්නනවා.
ඔයාට Windows එකෙන් device drivers auto-matically update කරන එක නවත්තන්න පුළුවන්.
Key Takeaways
- Automatic driver updates නවත්තන්න පහසුම ක්රමය තමයි Device Installation Settings.
- Pro/Enterprise systems වල Group Policy සහ Registry වැඩි control එකක් දෙනවා.
- Automatic driver updates disable කරනවා කියන්නේ ඔයා වැදගත් drivers ඔයාම install කරගන්න ඕන කියන එකයි.
- වෙනස් කරපු දේ ආපහු reverse කරලා ඕන වෙලාවක automatic updates ආපහු enable කරන්න පුළුවන්.
Method 1 — Device Installation Settings
1. Windows key + R press කරලා, sysdm.cpl type කරලා, System Properties open කරන්න Enter press කරන්න.
2. Hardware tab එකට switch වෙලා Device Installation Settings click කරන්න.
3. "No (your device might not work as expected)" තෝරන්න.
4. Save Changes click කරන්න.
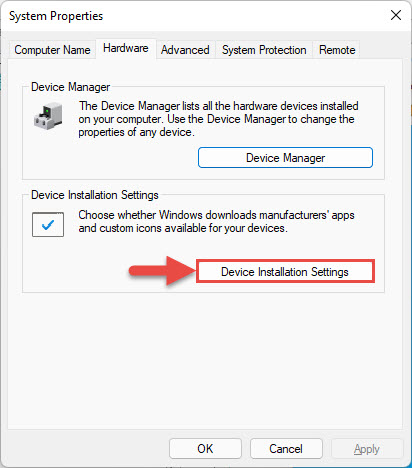
Automatic driver updates නවත්තන්න Device Installation Settings එක “No” කරන්න.
Method 2 — Group Policy
1. Windows key + R press කරලා, gpedit.msc type කරලා, Enter press කරන්න (Pro/Enterprise editions).
2. Computer Configuration > Administrative Templates > Windows Components > Windows Update > Manage updates offered from Windows Update වෙත යන්න.
3. "Do not include drivers with Windows Updates" open කරලා, Enabled කරලා, OK click කරන්න.
4. Apply වෙන්න PC එක restart කරන්න.
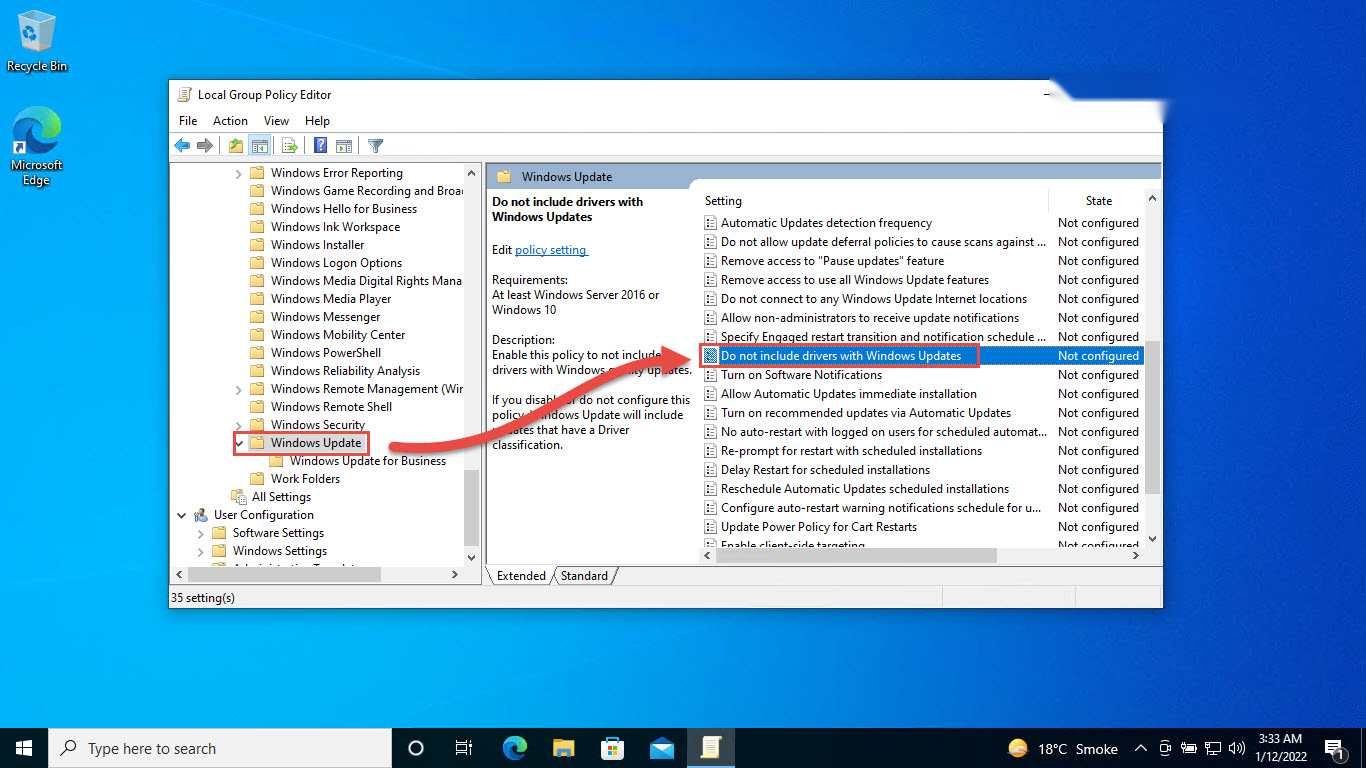
Windows Update එකෙන් drivers exclude කරන්න Group Policy එක enable කරන්න.
Method 3 — Windows Registry
Warning: Registry එක වැරදියට edit කරොත් ප්රශ්න ඇති වෙන්න පුළුවන්. වෙනස්කම් කරන්න කලින් registry එක back up කරන්න (File > Export).
1. Windows key + R press කරලා, regedit type කරලා, Enter press කරන්න.
2. HKEY_LOCAL_MACHINE\SOFTWARE\Microsoft\Windows\CurrentVersion\DriverSearching වෙත යන්න.
3. Windows Update එකෙන් drivers search කරන එක නවත්තන්න SearchOrderConfig value එක 0 කරන්න.
4. PC එක restart කරන්න. ආපහු enable කරන්න value එක ආපහු 1 කරන්න.
Installing Drivers Manually
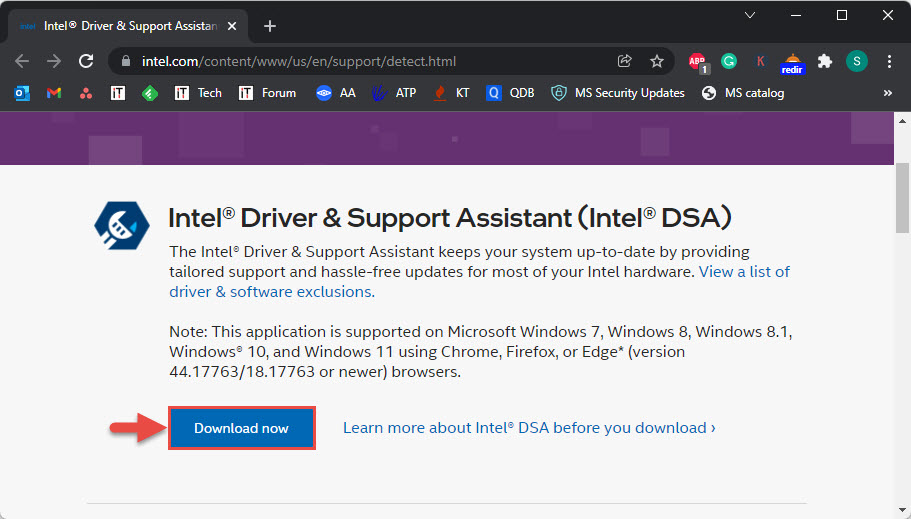
1. ඔයාගේ device එකේ නැත්නම් PC manufacturer ගේ official support page එකෙන් driver එක download කරන්න.
2. Device Manager open කරලා, device එක right-click කරලා, Update driver තෝරන්න.
3. Browse my computer for drivers තෝරලා download කරපු files වලට point කරන්න.
4. Prompts follow කරලා අවශ්ය නම් restart කරන්න.
Troubleshooting
Problem: Setting එක වෙනස් කරාට පස්සෙත් Windows එකෙන් driver එකක් update කරනවා.
Solution: Device Installation Settings එකට අමතරව Group Policy හෝ Registry method එකත් apply කරලා restart කරන්න. සමහර quality updates වල තාමත් critical drivers තියෙන්න පුළුවන්.
Problem: gpedit.msc නැහැ.
Solution: Group Policy Editor එක තියෙන්නේ Pro/Enterprise editions වල විතරයි. Home editions වල ඒ වෙනුවට Registry method එක use කරන්න.
Problem: Updates block කරාට පස්සේ device එකක් වැඩ කරන එක නැවතුනා.
Solution: නිවැරදි driver එක manufacturer ගෙන් manually install කරන්න, නැත්නම් Windows එකෙන් supply කරන්න දෙන්න තාවකාලිකව automatic updates ආපහු enable කරන්න.
Problem: ඔයාට updates ආපහු ඕන.
Solution: වෙනස ආපහු reverse කරන්න: Device Installation Settings එක Yes කරන්න, policy එක Not Configured කරන්න, නැත්නම් registry value එක 1 කරන්න.
Conclusion
Automatic driver updates disable කරනවා කියන්නේ ඔයාගේ PC එකේ මොන drivers run වෙනවද කියන එකේ control එක ඔයාට ලැබෙනවා කියන එකයි. ඉක්මන් වෙනසකට Device Installation Settings use කරන්න, නැත්නම් වැඩි control එකකට Group Policy/Registry use කරන්න — ඊට පස්සේ වැදගත් drivers ඔයාම install කරගන්න එක මතක තියාගන්න.
About TechHub
මේ guide එක TechHub Knowledge Base එකේ කොටසක්. තව step-by-step IT guides සහ support වලට techhub.com.lk එකට යන්න.