Overview
Outlook එකට ඔබේ emails පස්සේ, ඔබ තෝරන වෙලාවකට යවන්න පුළුවන්, ඔබ නැති වෙලාවට automatically reply කරන්නත් පුළුවන්. Scheduling එකෙන් දැන් ලියලා හරි වෙලාවට යවන්න පුළුවන්, Out-of-Office replies එකෙන් holiday එකක/leave එකක ඉන්නකොට contacts ලාට දැනුම් දෙනවා. මේ guide එකෙන් web, desktop සහ Android වල ඒ දෙකම cover කරනවා.
Outlook එකේ emails schedule කරන්න සහ automatic replies set කරන්න.
Key Takeaways
- Future time එකකට email එකක් schedule කරන්න Delay Delivery / Send later පාවිච්චි කරන්න.
- Out-of-Office (Automatic Replies) එකෙන් ඔබ නැති වෙලාවට set කරපු message එකක් යවනවා.
- මේ features දෙකම Outlook web, desktop සහ mobile වල තියෙනවා.
- Replies automatically off වෙන්න start සහ end times set කරන්න පුළුවන්.
Emails Schedule කරන්න — Outlook on the Web
1. සාමාන්ය විදිහට email එක compose කරන්න.
2. Send එක ළඟ arrow එක click කරලා Schedule send තෝරන්න.
3. Date එකයි time එකයි තෝරලා confirm කරන්න.
4. Email එක Drafts/Outbox එකට යනවා, ඒ වෙලාවට automatically යවනවා.
Emails Schedule කරන්න — Outlook Desktop
1. Email එක compose කරන්න.
2. Options tab එකේ Delay Delivery click කරන්න.
3. Delivery options යටතේ "Do not deliver before" tick කරලා date එකයි time එකයි set කරන්න.
4. Close කරලා, Send click කරන්න — scheduled time එක එනකම් Outbox එකේ රැඳෙනවා (classic accounts වලට Outlook running වෙන්න ඕන).
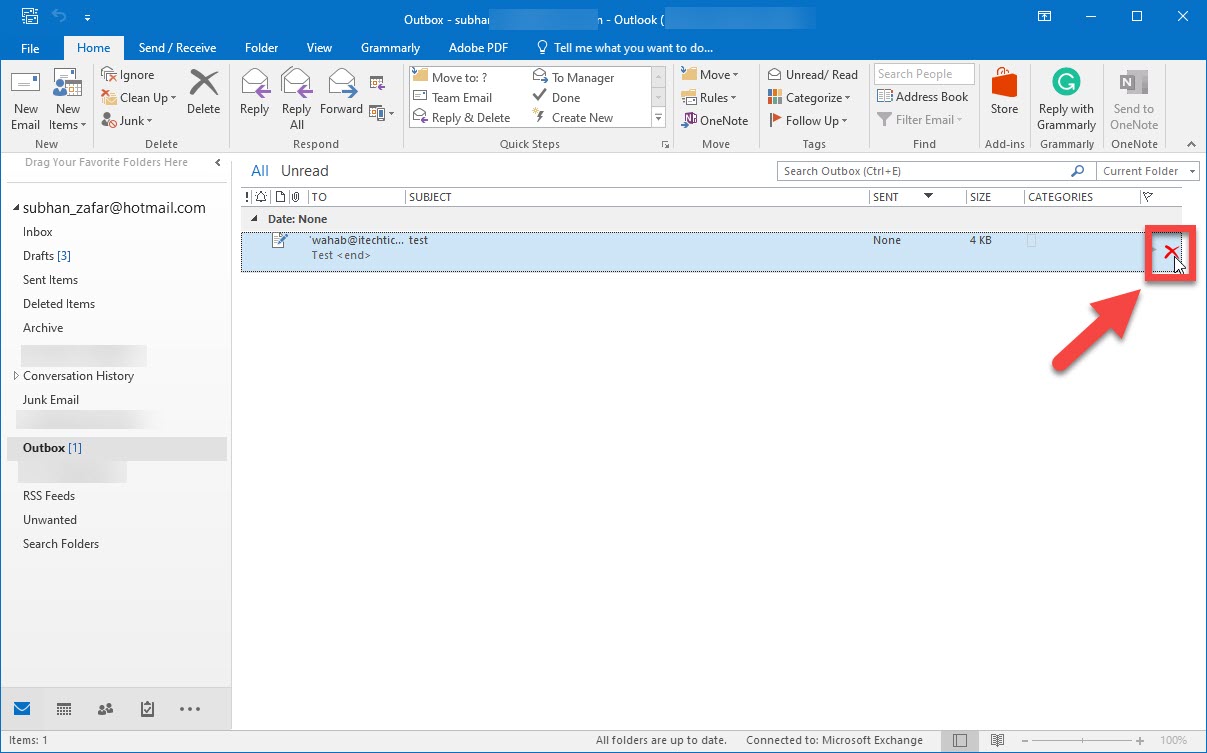
Scheduled email එකක් යවන්න කලින් cancel හෝ reschedule කරන්න පුළුවන්.
Emails Schedule කරන්න — Outlook for Android
1. Outlook app එකේ email එක compose කරන්න.
2. Three-dot menu එක tap කරලා Schedule send තෝරන්න.
3. Time එකක් තෝරලා confirm කරන්න.
Out-of-Office Replies — Outlook on the Web
1. Settings (gear) > Mail > Automatic replies open කරන්න.
2. Automatic replies on කරන්න.
3. ඕන නම් start සහ end time එකක් set කරන්න.
4. Message එක type කරන්න (ඕන නම් external senders ලාට වෙනම එකක්), ඊට පස්සේ Save කරන්න.
Out-of-Office Replies — Outlook Desktop
1. File > Automatic Replies (Out of Office) වලට යන්න.
2. "Send automatic replies" තෝරලා ඕන නම් time range එකක් set කරන්න.
3. Inside My Organization සහ Outside My Organization tabs වල message එක type කරන්න.
4. OK click කරන්න.
Note: Desktop එකේ Automatic Replies (Out of Office) වලට Microsoft 365/Exchange account එකක් ඕන. වෙන accounts වලට rule එකක් පාවිච්චි කරන්න, නැත්නම් Outlook on the web එකෙන් set කරන්න.
Out-of-Office Replies — Outlook for Android
1. Outlook app එක open කරලා Settings එකේ ඔබේ account එක tap කරන්න.
2. Automatic replies tap කරන්න.
3. On කරලා, time range එක set කරලා, message එක type කරලා save කරන්න.
Troubleshooting
Problem: මගේ scheduled email එක ගියේ නෑ.
Solution: Delay Delivery පාවිච්චි කරන classic desktop accounts වලට, scheduled time එකේ Outlook open වෙලා තියෙන්න ඕන. Server-side scheduling වලට Outlook on the web/Microsoft 365 පාවිච්චි කරන්න.
Problem: Automatic Replies option එක නෑ.
Solution: ඒකට Microsoft 365/Exchange account එකක් ඕන. වෙන accounts වල auto-reply rule එකක් set කරන්න, නැත්නම් Outlook on the web පාවිච්චි කරන්න.
Problem: Replies off වෙන්නේ නෑ.
Solution: Automatic Replies enable කරනකොට end time එකක් set කරන්න, නැත්නම් ආපහු ආවම manually off කරන්න.
Problem: External contacts ලාට replies එන්නේ නෑ.
Solution: "Outside my organization" message එක enable කරලා, mail admin එකෙන් ඒක allow කරලා තියෙනවද බලන්න.
Conclusion
Emails schedule කරන එකයි Out-of-Office replies set කරන එකයි ඔබේ communication එක timely සහ professional කරනවා. හරි timing එකට Schedule send, ඔබ නැති කාලයට Automatic Replies පාවිච්චි කරන්න — Outlook web, desktop සහ mobile ඔක්කොම වල තියෙනවා.
About TechHub
මේ guide එක TechHub Knowledge Base එකේ කොටසක්. තව step-by-step IT guides සහ support වලට techhub.com.lk එකට යන්න.