Windows එකේ Program එකකට Specific GPU එකක් Force කරන්නේ කොහොමද
Settings එකෙනුයි right-click menu එකෙනුයි apps ඔයාගේ dedicated (හෝ integrated) GPU එකට assign කරන්න.
Overview
Laptops සහ බොහෝ PCs වල GPU දෙකක් තියෙනවා — integrated (power-saving) සහ dedicated (high-performance). මේ guide එකෙන් performance එක හෝ battery life එක වැඩි කරගන්න, specific program එකකට ඔයාට ඕන GPU එක force කරන්නේ කොහොමද කියලා පෙන්නනවා.
Program එකකට specific GPU එකක් force කරමින්.
Key Takeaways
- Windows Graphics settings එකෙන් app එකකට GPU එකක් assign කරනවා.
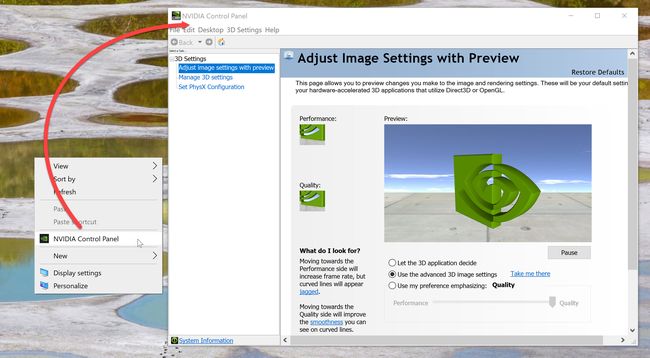
- Right-click "Run with graphics processor" එකත් වැඩ කරනවා (NVIDIA/AMD).
- Dedicated GPU = performance; integrated = battery.
- Task Manager එකේ GPU column එකෙන් usage confirm කරන්න.
Method 1: Windows Graphics Settings
1. Settings > System > Display > Graphics open කරන්න.
2. App එක add කරන්න (ඒකේ .exe එකට Browse කරන්න) නැත්නම් list එකෙන් තෝරන්න.
3. Options click කරලා "High performance" (dedicated GPU) හෝ "Power saving" (integrated) තෝරන්න.
4. Save කරන්න; ඊළඟ launch එකේදී app එක ඒ GPU එක පාවිච්චි කරනවා.
Method 2: Right-Click Menu
1. App/shortcut එක right-click කරන්න.
2. "Run with graphics processor" > "High-performance NVIDIA processor" (හෝ AMD) තෝරන්න.
3. මේකෙන් ඒ session එකට dedicated GPU එකේ run කරනවා.
Method 3: GPU Control Panel
1. NVIDIA Control Panel > Manage 3D settings > Program Settings: app එක තෝරලා preferred GPU එක set කරන්න.
2. AMD Radeon Software > Gaming/Graphics: app එකට අනුව GPU එක assign කරන්න.
3. හැම app එකකටම එක GPU එකක් prefer කරන්න ඕන නම් global defaults set කරන්න.
මොන GPU එකද පාවිච්චි වෙන්නේ කියලා Verify කරන එක
1. Task Manager > Processes open කරලා GPU/GPU Engine columns add/enable කරන්න.
2. නැත්නම් Task Manager > Performance එකෙන් per-GPU load එක බලන්න.
3. Load එකක් තියෙද්දී app එක intended GPU එකේද කියලා confirm කරන්න.
Troubleshooting
Problem: App එක තාමත් වැරදි GPU එක පාවිච්චි කරනවා.
Solution: ඒක Windows Graphics settings එකේයි GPU vendor control panel එකේයි දෙකෙම set කරන්න; app එක restart කරන්න.
Problem: "High performance" option එකක් නෑ.
Solution: GPU drivers update කරන්න; single-GPU systems වල choice එකක් පෙන්නන්නේ නෑ.
Problem: "Run with graphics processor" නෑ.
Solution: NVIDIA/AMD control panel එකේ context-menu settings වල ඒක enable කරන්න.
Problem: Battery එක ඉක්මනට බැහෙනවා.
Solution: demanding නැති apps "Power saving" (integrated GPU) එකට set කරන්න.
Conclusion
Settings > System > Display > Graphics හරහා (High performance vs Power saving) apps නිවැරදි GPU එකට assign කරන්න, නැත්නම් right-click "Run with graphics processor" option එකෙනුයි GPU vendor control panel එකෙනුයි කරන්න. Task Manager එකෙන් verify කරන්න, සහ demanding apps වලට dedicated GPU එකයි battery savings වලට integrated එකයි පාවිච්චි කරන්න.