Overview
If your PC has boot problems, unstable hardware, or settings you can no longer untangle, resetting the BIOS/UEFI to factory defaults often helps. This guide covers three ways to do it: from inside the firmware, using the motherboard’s clear jumper, and by removing the CMOS battery.
Resetting BIOS/UEFI restores firmware settings to factory defaults.
Key Takeaways
- Resetting clears custom firmware settings like boot order, overclocks, and XMP.
- The easiest method is "Load Setup Defaults" inside the BIOS/UEFI.
- The jumper and CMOS-battery methods help when you cannot reach the firmware menu.
- Resetting does not delete files on your drives — only firmware settings.
Why Reset the BIOS/UEFI?
- Fix boot issues caused by wrong boot order or settings.
- Undo an unstable overclock or memory (XMP) profile.
- Clear a forgotten BIOS password (via CMOS reset).
- Return to a known-good baseline before troubleshooting hardware.
Method 1 — Load Defaults From the Firmware Menu
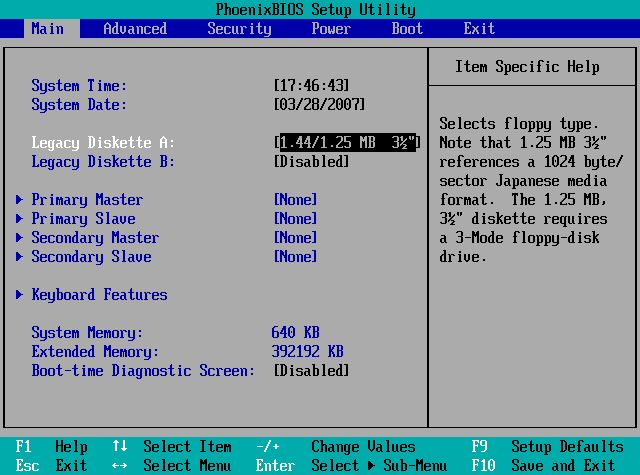
1. Restart the PC and press the BIOS/UEFI key during boot (commonly Del, F2, F10, or Esc — check your maker).
2. Find the option "Load Setup Defaults", "Load Optimized Defaults", or "Restore Defaults" (often on F9).
3. Confirm the reset.
4. Save and exit (often F10) to reboot with default settings.
Method 2 — Motherboard Clear CMOS Jumper
Warning: Power off and unplug the PC, and discharge static by touching the metal case before touching components.
1. Shut down and unplug the computer.
2. Open the case and locate the Clear CMOS jumper (often labelled CLRTC, CLR_CMOS, or JBAT1).
3. Move the jumper from pins 1–2 to pins 2–3 for a few seconds (or short the two pins if there is no jumper cap), then return it.
4. Close the case, reconnect power, and boot — the BIOS is reset.
Method 3 — Remove the CMOS Battery
1. Shut down and unplug the PC.
2. Open the case and find the round, coin-shaped CMOS battery on the motherboard.
3. Gently remove it and wait 5–10 minutes so the firmware settings clear.
4. Reinsert the battery, close the case, reconnect power, and boot.
Note: After a CMOS reset, you may need to set the date/time and boot order again in the firmware.
Troubleshooting
Problem: You cannot enter the BIOS to reset it.
Solution: Use the jumper or CMOS-battery method, which work without accessing the firmware menu.
Problem: The PC will not boot after resetting.
Solution: Re-enter the BIOS and set the correct boot drive and, if needed, the SATA mode (AHCI) your OS expects.
Problem: A BIOS password is blocking access.
Solution: Clearing the CMOS (jumper or battery) usually removes a forgotten BIOS password.
Problem: Settings revert every boot.
Solution: A dead CMOS battery cannot hold settings — replace it (typically a CR2032).
Conclusion
Resetting the BIOS/UEFI to defaults is a safe, reliable troubleshooting step that leaves your files untouched. Try Load Defaults from the firmware first, and use the jumper or CMOS battery when you cannot get into the menu.
</w:pBdr><w:spacing w:before="220" w:after="40"/></w:pPr><w:r><w:rPr><w:b/><w:bCs/><w:color w:val="0B5394"/><w:sz w:val="21"/><w:szCs w:val="21"/><w:rFonts w:ascii="Calibri" w:cs="Calibri" w:eastAsia="Calibri" w:hAnsi="Calibri"/></w:rPr><w:t xml:space="preserve">About TechHub
This guide is part of the TechHub Knowledge Base. For more step-by-step IT guides and support, visit techhub.com.lk.