Overview
Microsoft Defender (Windows Security) එකක් file එකක් threat එකක් විදිහට flag කරාම, ඒක quarantine එකේ isolate කරනවා. File එකක් safe කියලා ඔබ sure නම්, ඒක restore කරන්න පුළුවන්. මේ guide එකෙන් ඒ ක්රම දෙකක් පෙන්නනවා — trust කරන files විතරයි restore කරන්න කියන වැදගත් caution එකක් එක්ක.
Microsoft Defender එකෙන් quarantine කරපු files restore කරන්න.
Warning: Quarantined file එකක් restore කරන්නේ ඒක safe කියලා ඔබ sure නම් විතරයි. Defender malicious කියලා සලකන files quarantine කරනවා — genuine malware restore කරන එකෙන් ඔබේ PC එක compromise කරන්න පුළුවන්.
Key Takeaways
- Quarantined files isolate කරලා, delete කරලා නෑ.
- ඒවා Windows Security's Protection history එකෙන් restore කරන්න.
- MpCmdRun command-line tool එකෙනුත් restore කරන්න පුළුවන්.
- Defender trusted file එකක් ආපහු ආපහු quarantine කරනවා නම් exclusion එකක් add කරන්න.
Quarantine එකෙන් අදහස් වෙන්නේ මොකද
Defender suspected threats run වෙන්න බැරි වෙන්න protected, encrypted location එකකට move කරනවා. Commonly quarantine වෙන files: flagged downloads, cracked software, සහ virus signatures වලට match වෙන items. ඒවා remove කරනකම් recoverable පවතිනවා.
Method 1: Windows Security එකෙන් Restore කරන්න
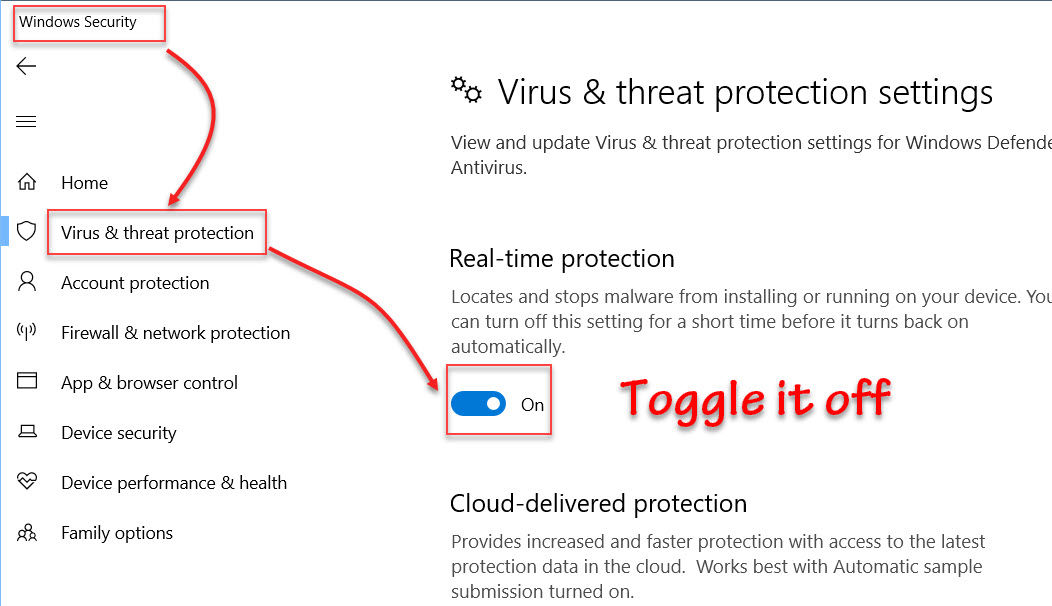
1. Windows Security > Virus & threat protection open කරන්න.
2. "Protection history" click කරන්න.
3. Quarantined item එක හොයලා expand කරන්න.
4. Actions > Restore click කරන්න (prompt වුණොත් Allow on device තෝරන්න).
Method 2: Command Prompt එකෙන් Restore කරන්න
1. Command Prompt එක administrator විදිහට open කරන්න.
2. Defender folder එකට යන්න: cd "C:\Program Files\Windows Defender"
3. Quarantined items list කරන්න: MpCmdRun.exe -Restore -ListAll
4. එකක් restore කරන්න: MpCmdRun.exe -Restore -Name "<ThreatName>" (හෝ ඔක්කොම restore කරන්න -All).
Exclusion එකක් Add කරන්න (Optional)
1. Defender trusted file එකක් ආපහු ආපහු quarantine කරනවා නම්, Virus & threat protection > Manage settings > Exclusions open කරන්න.
2. File එක හෝ folder එක exclusion එකක් විදිහට add කරන්න.
3. Exclusions sparingly පාවිච්චි කරන්න — ඒවා ඒ path එකට protection අඩු කරනවා.
Troubleshooting
Problem: Restore කළාට පස්සේ file එක ආපහු quarantine වෙනවා.
Solution: ඒකට specific exclusion එකක් add කරන්න — ඒත් ඒක safe කියලා sure නම් විතරයි.
Problem: Restore option එක නෑ.
Solution: Item එක auto-removed වෙන්න පුළුවන්; retention settings බලලා, quarantine cleanup run වෙන්න කලින් act කරන්න.
Problem: Command line එකේ "Access denied".
Solution: Command Prompt එක administrator විදිහට run කරලා -ListAll එකෙන් exact threat name එක පාවිච්චි කරන්න.
Problem: Quarantined file එකක් run කරන එක safe ද?
Solution: ඒකේ source එකයි integrity එකයි verify කරන්න පුළුවන් නම් විතරයි; සැක නම්, quarantined තියන්න.
Conclusion
Microsoft Defender එකෙන් Protection history හෝ MpCmdRun tool එක හරහා quarantined files recoverable තියාගන්නවා. Safe කියලා verify කරපු ඒවා විතරයි restore කරලා, ඔබේ PC එකේ protection අඩු නොවෙන්න exclusions පරිස්සමින් පාවිච්චි කරන්න.
About TechHub
මේ guide එක TechHub Knowledge Base එකේ කොටසක්. තව step-by-step IT guides සහ support වලට techhub.com.lk එකට යන්න.