Overview
ඔයාගේ computer name එකෙන් network එකක සහ remote-management tools වල ඔයාගේ PC එක identify කරනවා. පැහැදිලි, consistent naming scheme එකකින් files share කරනකොට, remote connect වෙනකොට, හෝ device ගොඩක් administer කරනකොට හරි machine එක හොයාගන්න ගොඩක් ලේසි වෙනවා. Windows එකෙන් computer එකක් rename කරන්න local machine එකේ සහ remote විදිහටත් ක්රම කිහිපයක් දෙනවා. මේ guide එකෙන් විශ්වාසවන්ත ක්රම හතරක් cover කරනවා.
Key Takeaways
- PC එකක් Settings, System Properties, Command Prompt, හෝ PowerShell වලින් rename කරන්න පුළුවන්.
- අලුත් name එක සම්පූර්ණයෙන් effect වෙන්න restart එකක් අවශ්යයි.
- Letters, numbers, සහ hyphens විතරක් පාවිච්චි කරන්න — spaces සහ special characters වළක්වන්න.
- හරි credentials තියෙනකොට PowerShell වලින් remote computer එකක් rename කරන්න පුළුවන්.
Method 1: Rename From Settings
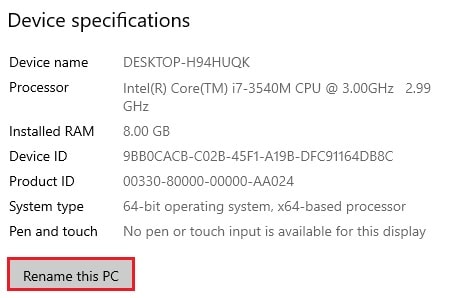
1. Settings open කරලා System > About එකට යන්න.
2. Rename this PC click කරන්න.
3. අලුත් name එක enter කරලා Next click කරන්න.
4. Change එක apply කරන්න prompt වුණාම computer එක restart කරන්න.
Settings app එකෙන් PC එක rename කරනවා.
Method 2: System Properties
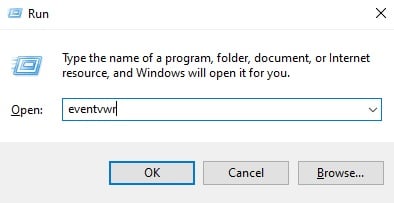
1. Windows + R press කරලා, sysdm.cpl type කරලා Enter press කරන්න.
2. Computer Name tab එකේ, Change click කරන්න.
3. අලුත් computer name එක type කරලා OK click කරන්න.
4. ආපහු OK click කරලා prompt වුණාම restart කරන්න.
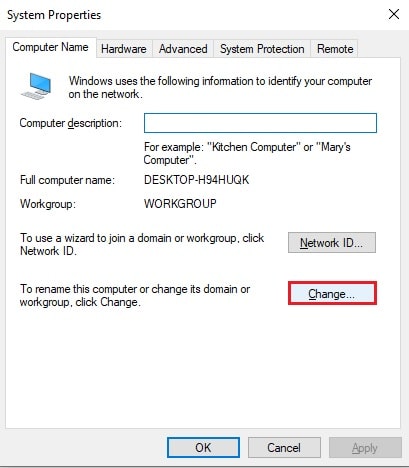
System Properties dialog එකෙන් name එක වෙනස් කරනවා.
Method 3: Command Prompt
wmic command එක elevated Command Prompt එකකින් වැඩ කරනවා. NewName වෙනුවට ඔයා තෝරගත්ත name එක දාන්න.
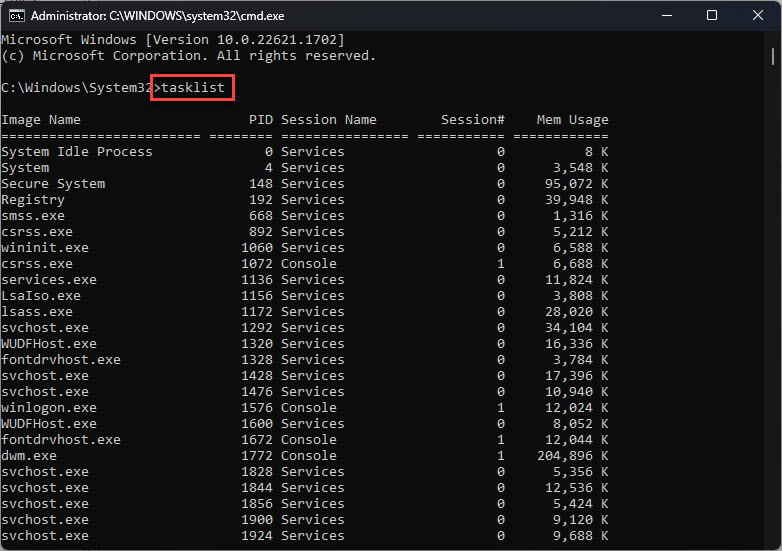
1. Command Prompt එක administrator විදිහට open කරන්න.
2. Run: wmic computersystem where name="%computername%" call rename name="NewName"
3. Success message එකක් එනකම් ඉන්න, ඊට පස්සේ PC එක restart කරන්න.
Method 4: PowerShell (Local and Remote)
PowerShell ගේ Rename-Computer cmdlet එකෙන් local සහ remote renames දෙකම handle කරනවා.
1. PowerShell එක administrator විදිහට open කරන්න.
2. local PC එක rename කරන්න run: Rename-Computer -NewName "NewName" -Restart
3. remote PC එකක් rename කරන්න run: Rename-Computer -ComputerName "OldName" -NewName "NewName" -DomainCredential Domain\\Admin -Restart
4. prompt වුණාම credentials දීලා remote machine එක restart වෙන්න දෙන්න.
Note: සම්පූර්ණ network compatibility එකට computer names characters 15කට සීමා වෙනවා. Letters, numbers, සහ hyphens වලට කොටු වෙන්න.
Warning: Domain එකක, computer එකක් rename කරන එකෙන් ඒකේ trust relationship එකට බලපානවා. Domain-joined machines rename කරන්න කලින් ඔයාගේ domain administrator එක්ක coordinate කරන්න.
Troubleshooting
Problem: වෙනස් කරාට පස්සේ අලුත් name එක පේන්නේ නෑ.
Solution: Computer එක restart කරන්න — rename එක reboot එකකට පස්සේ විතරයි සම්පූර්ණයෙන් effect වෙන්නේ.
Problem: ඔයා enter කරපු name එක Windows reject කරනවා.
Solution: Spaces සහ special characters අයින් කරන්න; character 15ක limit එක ඇතුළේ letters, numbers, සහ hyphens විතරක් පාවිච්චි කරන්න.
Problem: Remote rename එකක් access denied වෙලා fail වෙනවා.
Solution: PowerShell administrator විදිහට run කරලා, target computer එකේ administrative rights තියෙන account එකක් දෙන්න.
Problem: Domain-joined PC එකක rename කරාට පස්සේ connectivity නැති වෙනවා.
Solution: Active Directory එකේ computer object එක confirm කරලා, අවශ්ය නම් machine එක ආපහු domain එකට join කරන්න.
Conclusion
Graphical dialog එකක් හෝ command line එක ඔයා කැමති එකක් වුණත්, Windows එකෙන් PC එකක් rename කරන එක ඉක්මන් කරලා තියෙනවා. එකපාරට machine ගොඩක් manage කරන්න නම්, PowerShell ගේ remote rename එක තමයි වඩාත්ම efficient තේරීම.
About TechHub
මේ guide එක TechHub Knowledge Base එකේ කොටසක්. තව step-by-step IT guides සහ support වලට techhub.com.lk එකට යන්න.