Overview
The net share command lets you manage Windows network shares from the command line — faster than the GUI and easy to script. This guide shows how to view existing shares, create new ones with permissions, and delete them.
Manage network shared folders with the net share command.
Key Takeaways
- Run net share with no arguments to list all current shares.
- Create a share with net share Name=Path and grant permissions inline.
- Delete a share with net share Name /delete.
- Run Command Prompt as administrator for create/delete operations.
View Network Shares
1. Open Command Prompt.
2. Run: net share
3. It lists all shared folders, their local paths, and remarks.
4. For details on one share: net share ShareName
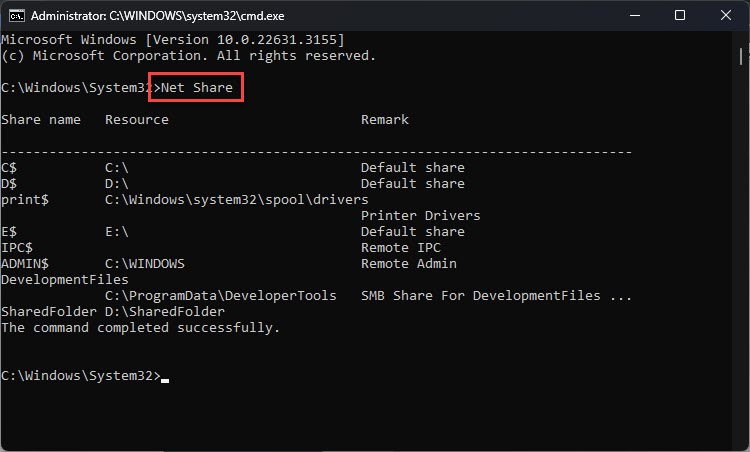
View network share information in Command Prompt.
Create a Network Share
1. Open Command Prompt as administrator.
2. Create a basic share: net share MyShare=C:\SharedFolder
3. Grant permissions: net share MyShare=C:\SharedFolder /grant:Everyone,READ (or ,FULL / ,CHANGE).
4. Limit concurrent users: add /users:5 (or /unlimited).
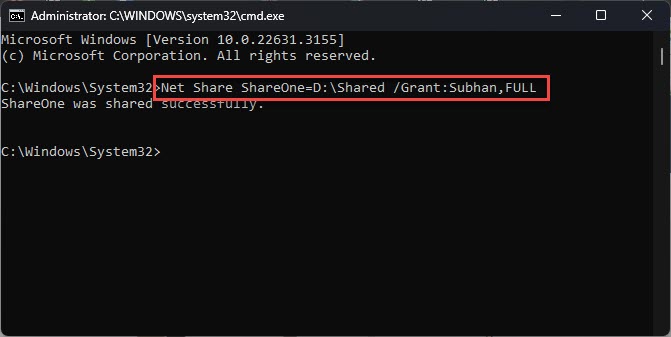
Create a shared folder with Command Prompt.
Note: Permissions here are share-level. NTFS file permissions also apply, so effective access is the most restrictive of the two.
Delete a Network Share
1. Open Command Prompt as administrator.
2. Run: net share MyShare /delete
3. The folder stops being shared (the folder itself is not deleted).
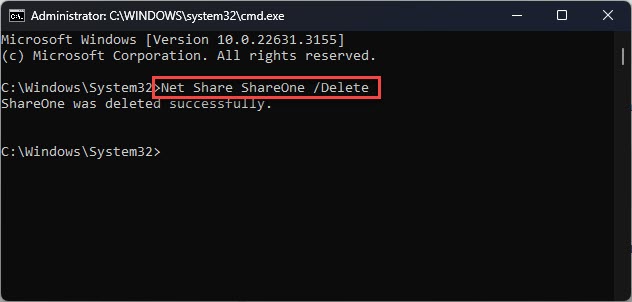
Delete a shared network folder using Command Prompt.
Troubleshooting
Problem: "Access is denied" creating or deleting a share.
Solution: Run Command Prompt as administrator — share management requires elevation.
Problem: Users cannot access the share.
Solution: Check both share permissions (/grant) and NTFS permissions on the folder; the effective permission is the more restrictive one.
Problem: The share name already exists.
Solution: Delete it first (net share Name /delete) or choose a different share name.
Problem: Cannot see the share from another PC.
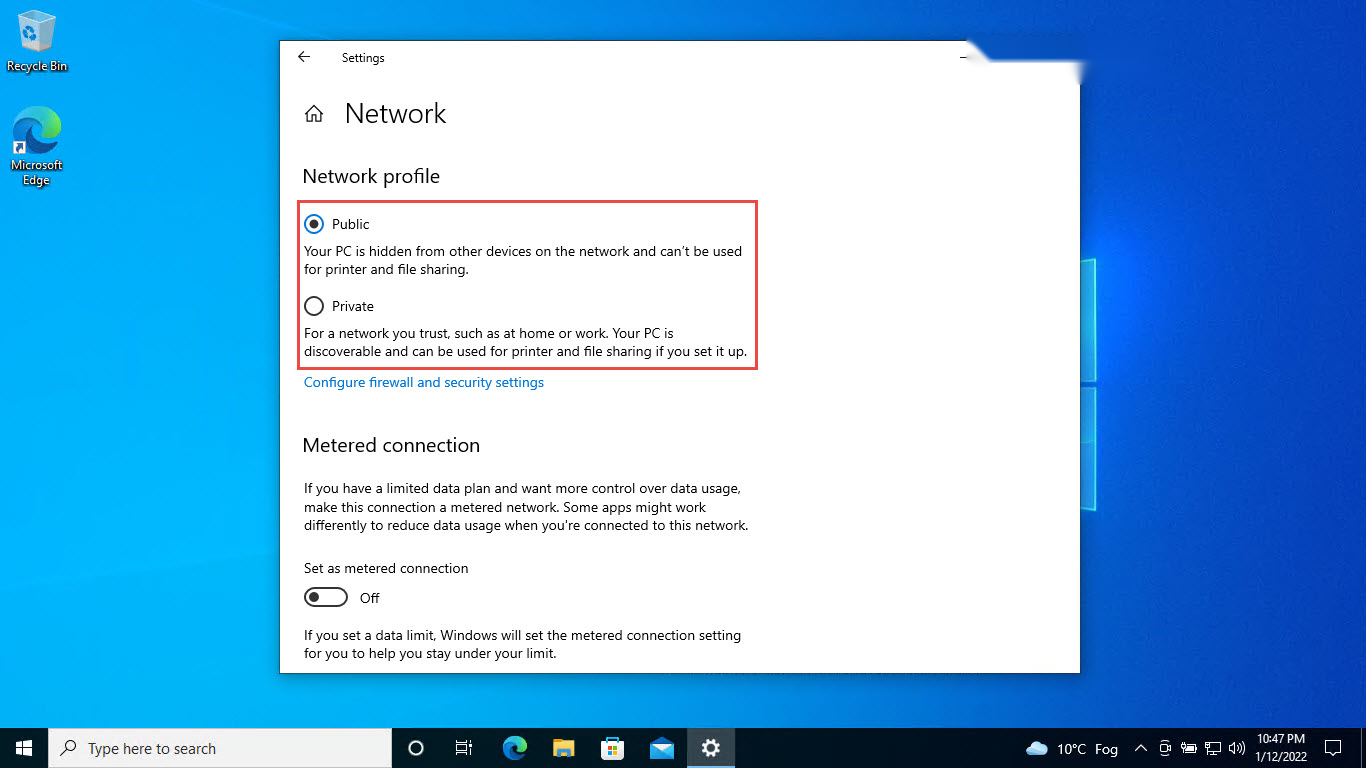
Solution: Ensure Network discovery and File and printer sharing are on, the network is Private, and the firewall allows file sharing.
Conclusion
The net share command makes managing shared folders fast and scriptable. List shares with net share, create them with permissions inline, and remove them with /delete — running as administrator for changes.
</w:pBdr><w:spacing w:before="220" w:after="40"/></w:pPr><w:r><w:rPr><w:b/><w:bCs/><w:color w:val="0B5394"/><w:sz w:val="21"/><w:szCs w:val="21"/><w:rFonts w:ascii="Calibri" w:cs="Calibri" w:eastAsia="Calibri" w:hAnsi="Calibri"/></w:rPr><w:t xml:space="preserve">About TechHub
This guide is part of the TechHub Knowledge Base. For more step-by-step IT guides and support, visit techhub.com.lk.