Overview
You can deactivate a second or third monitor in Windows without physically unplugging it — useful for temporarily disabling a display. This guide shows how via Settings and the Win + P quick menu.
Disconnecting monitors without unplugging.
Key Takeaways
- Win + P quickly switches display modes.
- Settings lets you disconnect a specific monitor.
- "Show only on 1" disables the others.
- No cables need to be unplugged.
Method 1: Win + P Quick Menu
1. Press Windows + P.
2. Choose "PC screen only" to use just the primary display.
3. Or pick "Second screen only" / "Duplicate" / "Extend" as needed.
Method 2: Settings (Disconnect a Specific Monitor)
1. Open Settings > System > Display.
2. Click the monitor you want to disable in the diagram.
3. Open the multiple-displays dropdown and choose "Disconnect this display".
4. The selected monitor goes inactive while staying plugged in.
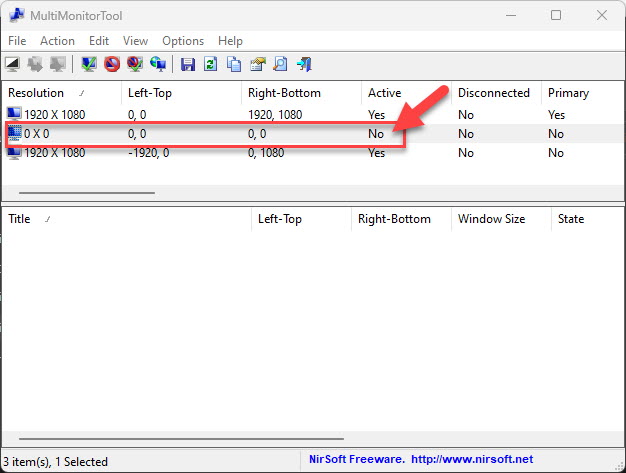
The monitor set to inactive.
Triple-Monitor Setup
1. In Settings > System > Display, select the specific third monitor.
2. Choose "Disconnect this display" for it, leaving the other two active.
3. Rearrange the remaining displays if needed.
Troubleshooting
Problem: "Disconnect this display" is missing.
Solution: Use Win + P > "PC screen only", or extend/duplicate options; update the GPU driver if options are limited.
Problem: Monitor reactivates after reboot.
Solution: Windows may re-detect it — set the preferred layout again, or turn the monitor off at the unit.
Problem: Windows moved to the disabled screen.
Solution: Set the primary display first, then disconnect the secondary so windows stay visible.
Problem: Resolution changed after disabling one.
Solution: Reset the resolution for the active display in Display settings.
Conclusion
You don’t need to pull cables to disable an extra monitor — Win + P offers quick mode switching, and Settings lets you disconnect a specific display while it stays plugged in. Set your primary display first so your windows remain where you expect.
</w:pBdr><w:spacing w:before="220" w:after="40"/></w:pPr><w:r><w:rPr><w:b/><w:bCs/><w:color w:val="0B5394"/><w:sz w:val="21"/><w:szCs w:val="21"/><w:rFonts w:ascii="Calibri" w:cs="Calibri" w:eastAsia="Calibri" w:hAnsi="Calibri"/></w:rPr><w:t xml:space="preserve">About TechHub
This guide is part of the TechHub Knowledge Base. For more step-by-step IT guides and support, visit techhub.com.lk.