Overview
Snip & Sketch is the built-in screenshot utility in Windows that lets you capture a region, window or the full screen and then crop, annotate and share it. In Windows 11 the app has merged into the modern Snipping Tool, but you can still reach the same capture experience in several ways. This guide covers three fast methods to open it and how to make screenshots even quicker.
Opening Snip & Sketch to capture and annotate a screenshot in Windows 11.
Key Takeaways
- In Windows 11, Snip & Sketch is now part of the Snipping Tool app.
- The Windows + Shift + S shortcut instantly starts a new snip.
- You can launch the tool from the Start menu or the search box.
- The Print Screen key can be set to open the snipping bar automatically.
Method 1: Use the Keyboard Shortcut
This is the fastest way to grab a screenshot without opening any window first.
1. Press Windows + Shift + S together.
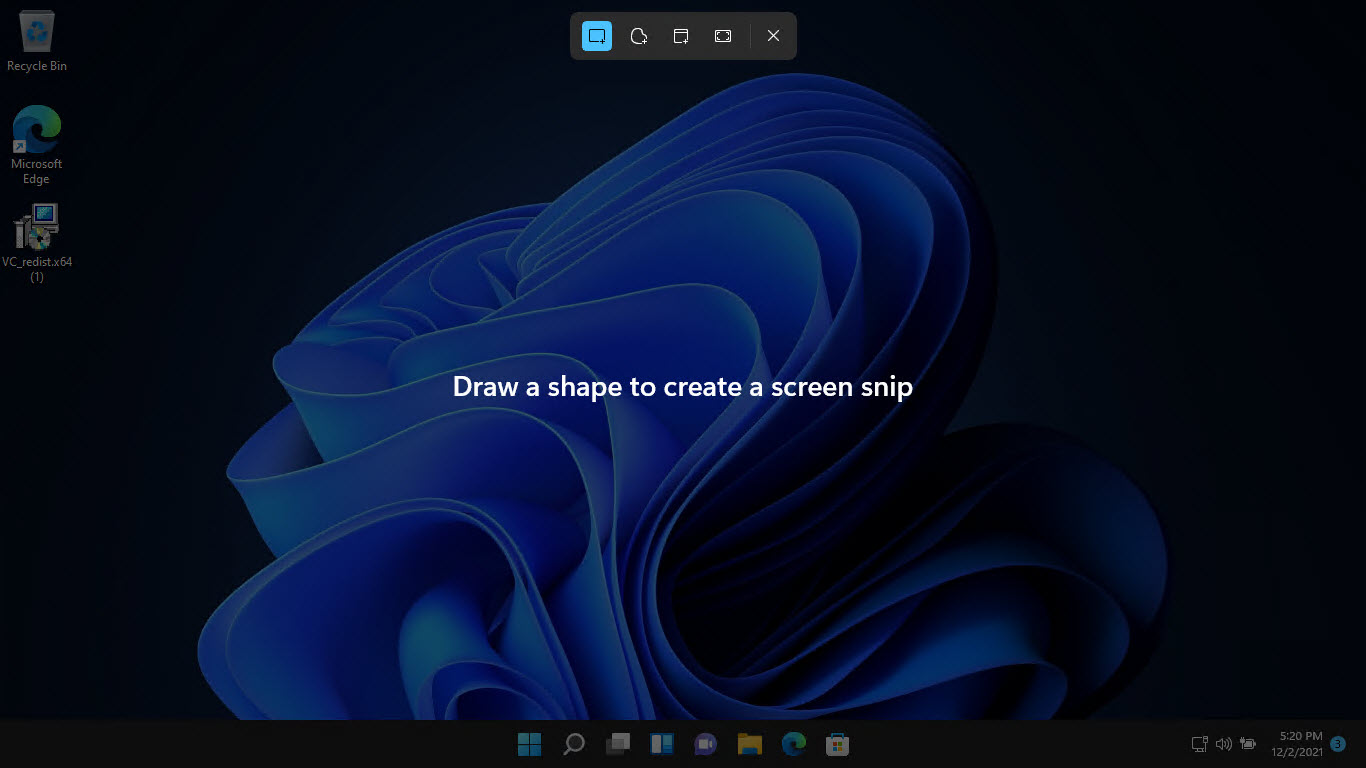
2. The screen dims and a small capture toolbar appears at the top.
3. Choose rectangular, freeform, window or full-screen capture.
4. Select the area — the snip is copied to the clipboard and a notification lets you open it for editing.
The capture toolbar shown after pressing Windows + Shift + S.
Method 2: Open from the Start Menu
1. Click the Start button.
2. Select "All apps" and scroll to "Snipping Tool" (which includes the Snip & Sketch features).
3. Click it to open the app window.
4. Click "New" to begin a capture.
<w:bottom w:val="single" w:color="E2F0E1" w:sz="2" w:space="4"/><w:left w:val="single" w:color="2E7D32" w:sz="24" w:space="8"/><w:right w:val="single" w:color="E2F0E1" w:sz="2" w:space="4"/></w:pBdr><w:shd w:fill="E2F0E1" w:color="auto" w:val="clear"/><w:spacing w:before="80" w:after="160"/><w:ind w:left="120" w:right="120"/></w:pPr><w:r><w:rPr><w:b/><w:bCs/><w:color w:val="2E7D32"/><w:sz w:val="21"/><w:szCs w:val="21"/><w:rFonts w:ascii="Calibri" w:cs="Calibri" w:eastAsia="Calibri" w:hAnsi="Calibri"/></w:rPr><w:t xml:space="preserve">Tip: Right-click the Snipping Tool in the Start menu and choose "Pin to taskbar" so it is always one click away.
Method 3: Use Windows Search
1. Press the Windows key or click the search icon on the taskbar.
2. Type "Snipping Tool" or "Snip".
3. Click the app in the results to open it.
4. Click "New" to take a screenshot.
Make Print Screen Open the Snipping Tool
You can map the Print Screen (PrtScn) key so it launches the snipping toolbar directly.
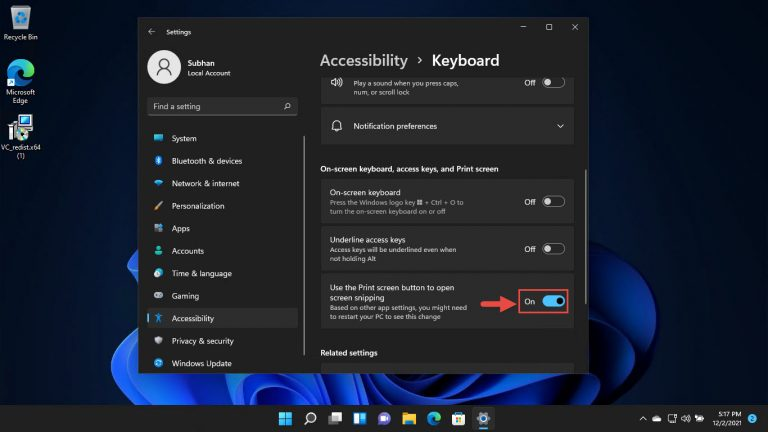
1. Open Settings and go to Accessibility > Keyboard (or Ease of Access > Keyboard).
2. Turn on "Use the Print screen button to open screen capture" (also labelled "Use the Print Screen key to open Snipping Tool").
3. Press PrtScn to confirm the capture toolbar now appears.
Configuring the Print Screen key to open the snipping toolbar.
Troubleshooting
Problem: Windows + Shift + S does not start a snip.
Solution: Ensure the Snipping Tool app is enabled and updated via the Microsoft Store. Restarting the PC or the Snipping Tool process usually restores the shortcut.
Problem: The screenshot is not saved to a file.
Solution: The shortcut copies snips to the clipboard by default. Click the notification to open the editor, then use the Save (disk) icon to store it as a PNG.
Problem: Print Screen still copies the full screen instead of opening the tool.
Solution: Enable the Print Screen option under Settings > Accessibility > Keyboard, then sign out and back in for the change to take effect.
Problem: The Snipping Tool app is missing.
Solution: Reinstall it from the Microsoft Store, or run "wsreset.exe" to refresh the Store cache and check for the app again.
Conclusion
Snip & Sketch — now unified with the Snipping Tool in Windows 11 — makes capturing and annotating screenshots effortless. The Windows + Shift + S shortcut is the quickest route, while the Start menu and search give you the full app window. Map the Print Screen key to the tool and screenshots become a single keystroke away.
About TechHub
This guide is part of the TechHub Knowledge Base. For more step-by-step IT guides and support, visit techhub.com.lk.