Overview
Optional updates (non-security driver සහ feature previews) සාමාන්යයෙන් Windows Update එකේ manual approval ඕන කරනවා. Windows 11 එකේ ඒවා automatically install වෙන්න configure කරන්න පුළුවන් — PCs fleet එකක් current තියාගන්න useful. මේ guide එකෙන් Group Policy හෝ registry පාවිච්චි කරලා ඒ ආකාරය පෙන්නනවා.
Optional Windows updates automatically install වෙන්න configure කරන්න.
Key Takeaways
- Optional updates සාමාන්යයෙන් manual; policy එකකින් automate කරන්න පුළුවන්.
- "Enable optional updates" Group Policy එක, හෝ AllowOptionalContent registry value එක පාවිච්චි කරන්න.
- මේක Windows Update හරහා driver සහ අනිත් optional/preview content වලට apply වෙනවා.
- Supported Windows 11 build එකක් ඕන.
Prerequisites
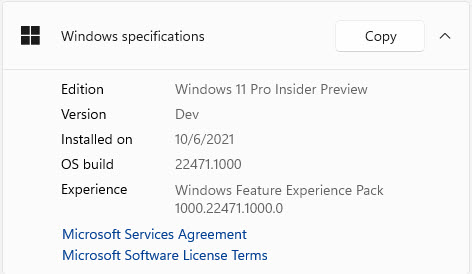
- Optional-updates policy එක support කරන recent Windows 11 build එකක් (winver එකෙන් බලන්න).
- Administrator rights.
- Group Policy Editor (Pro/Enterprise) හෝ registry access (හැම edition එකකම).
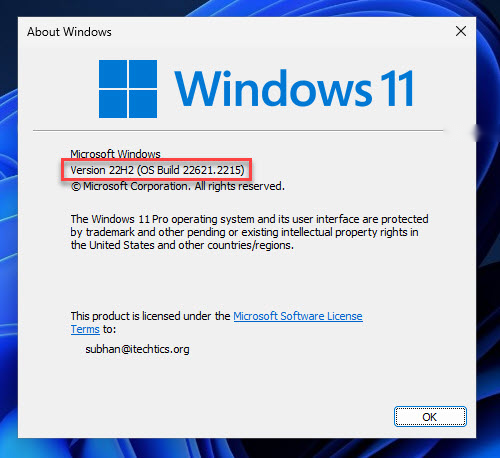
winver එකෙන් ඔබේ OS build එකයි version එකයි බලන්න.
Method 1 — Group Policy
1. Windows key + R press කරලා gpedit.msc type කරලා Enter කරන්න.
2. Computer Configuration > Administrative Templates > Windows Components > Windows Update > Manage updates offered from Windows Update වලට යන්න.
3. "Enable optional updates" open කරන්න.
4. Enabled කරලා "Automatically receive optional updates (including CFRs)" තෝරලා OK click කරන්න.
5. gpupdate /force run කරන්න.
Method 2 — Registry (Home Editions)
Warning: Edit කරන්න කලින් registry එක backup කරන්න.
1. Registry Editor open කරලා HKEY_LOCAL_MACHINE\SOFTWARE\Policies\Microsoft\Windows\WindowsUpdate වලට යන්න (key නැත්නම් හදන්න).
2. AllowOptionalContent කියන DWORD එකක් හදන්න.
3. Optional updates ඔක්කොම automatically install කරන්න 2 කරන්න (1 = available කරනවා; 0 = off).
4. PC එක restart කරන්න.
වැඩ කරනවද Verify කරන්න
1. Settings > Windows Update > Advanced options > Optional updates open කරන්න.
2. ඔබේ policy එක අනුව optional updates දැන් download/install වෙන්න ඕන.
3. Optional items install වුණාද confirm කරන්න update history බලන්න.
Troubleshooting
Problem: Policy එක නෑ.
Solution: Windows 11 එක "Enable optional updates" policy එක තියෙන build එකකට update කරලා, gpedit ආපහු check කරන්න.
Problem: Optional updates තවම manual approval ඕන.
Solution: AllowOptionalContent 2 කරලා (හෝ GPO එක automatic option එක්ක Enabled) කියලා confirm කරලා, gpupdate /force කරලා restart කරන්න.
Problem: සමහර optional updates විතරයි ඕන.
Solution: Value එක 2 වෙනුවට 1 (make available) කරන්න, එතකොට review කරලා manually තෝරන්න පුළුවන්.
Problem: Optional updates වලින් driver එකක් issues ඇති කළා.
Solution: Device Manager එකෙන් roll back කරලා, මුලින් drivers vet කරන්න optional updates manual කරන එක සලකා බලන්න.
Conclusion
Supported Windows 11 builds වල, "Enable optional updates" policy එකෙන් (හෝ AllowOptionalContent registry value එකෙන්) optional updates automate කරන්න පුළුවන්. Hands-off currency වලට automatic කරන්න, නැත්නම් මුලින් drivers review කරන්න කැමති නම් "make available" කරන්න.
About TechHub
මේ guide එක TechHub Knowledge Base එකේ කොටසක්. තව step-by-step IT guides සහ support වලට techhub.com.lk එකට යන්න.