Overview
WSL2 lets you run a real Linux kernel and distributions directly on Windows, with better performance than WSL1. This guide covers installing WSL2 on modern and older Windows, updating the kernel, and managing distros.
WSL2 on Windows 11 and 10.
Key Takeaways
- On Windows 11 / Windows 10 2004+, "wsl --install" does everything.
- WSL2 uses a real Linux kernel for better speed and compatibility.
- Older Windows 10 needs features enabled manually.
- You can install, switch, and remove multiple distros.
Install WSL2 (Windows 11 / Windows 10 2004+)
1. Open PowerShell or Terminal as administrator.
2. Run: wsl --install
3. This enables the required features and installs Ubuntu by default.
4. Restart when prompted.
5. On first launch, set a Linux username and password.
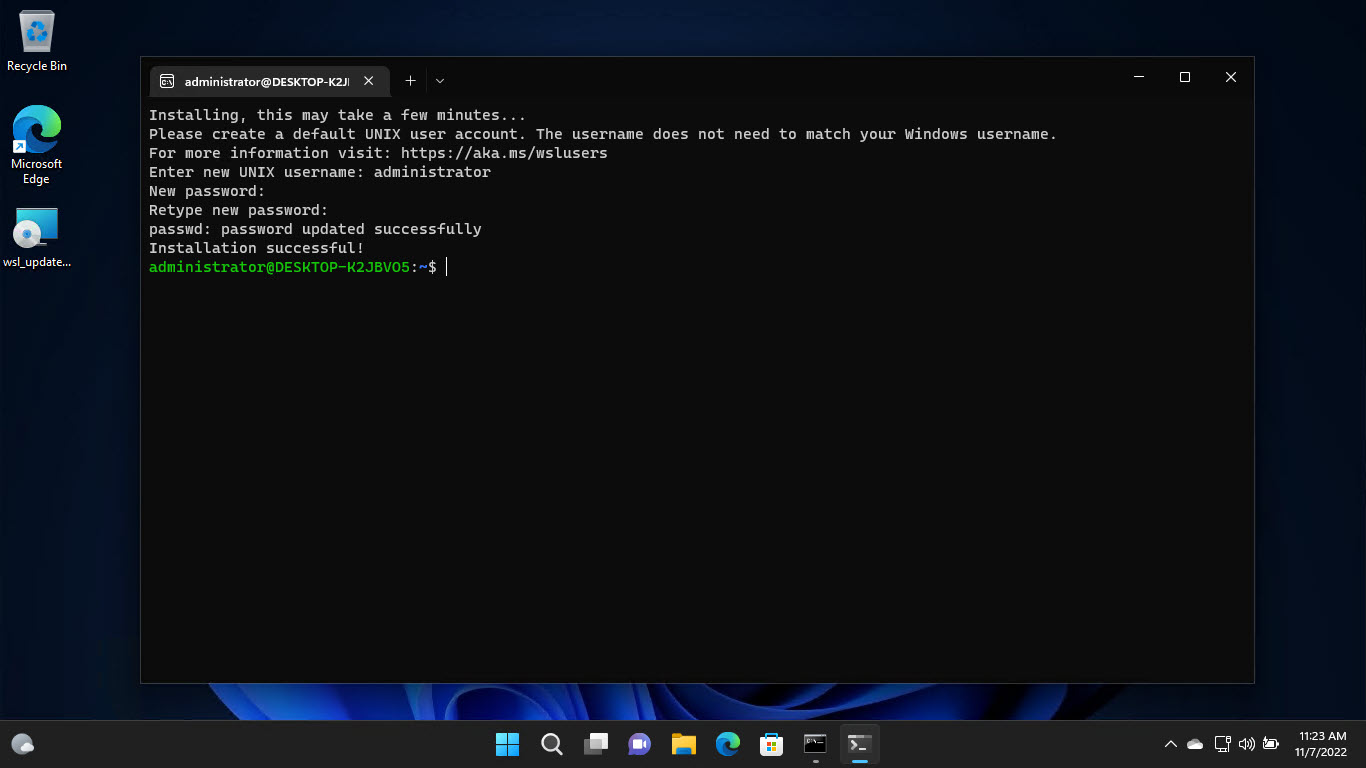
Configure your Linux username and password.
Install WSL2 (Windows 10 1909 or Older)
1. Enable features in PowerShell (admin): dism.exe /online /enable-feature /featurename:Microsoft-Windows-Subsystem-Linux /all /norestart
2. And: dism.exe /online /enable-feature /featurename:VirtualMachinePlatform /all /norestart
3. Restart the PC.
4. Download and install the WSL2 Linux kernel update from Microsoft’s official site.
5. Set WSL2 as default: wsl --set-default-version 2
6. Install a distro from the Microsoft Store.
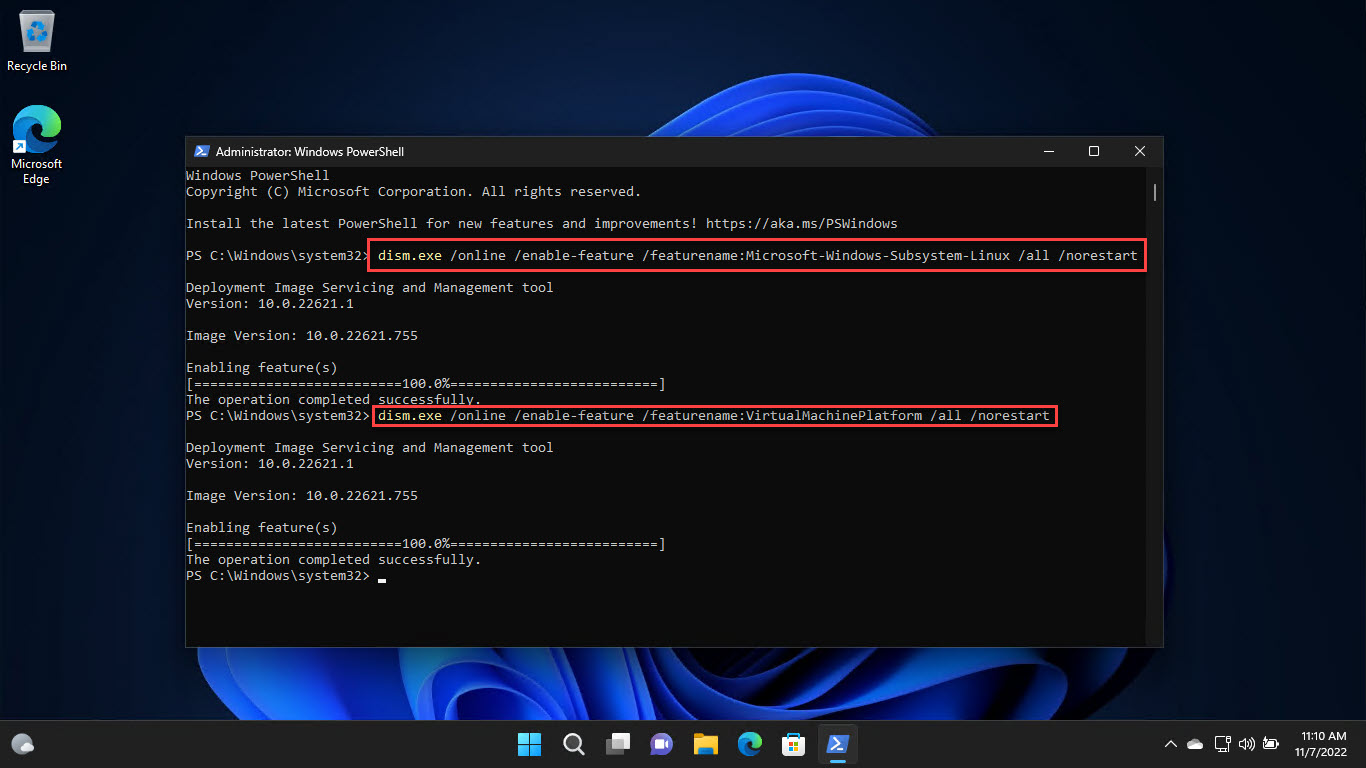
Enable the required features using PowerShell.
Update the Linux Kernel
1. Run: wsl --update
2. Optionally check status: wsl --status
3. Restart WSL with: wsl --shutdown
Manage Distros
1. List installed distros: wsl --list --verbose
2. Set a default: wsl --set-default <DistroName>
3. Run a specific distro: wsl -d <DistroName>
4. Set a distro’s version: wsl --set-version <DistroName> 2
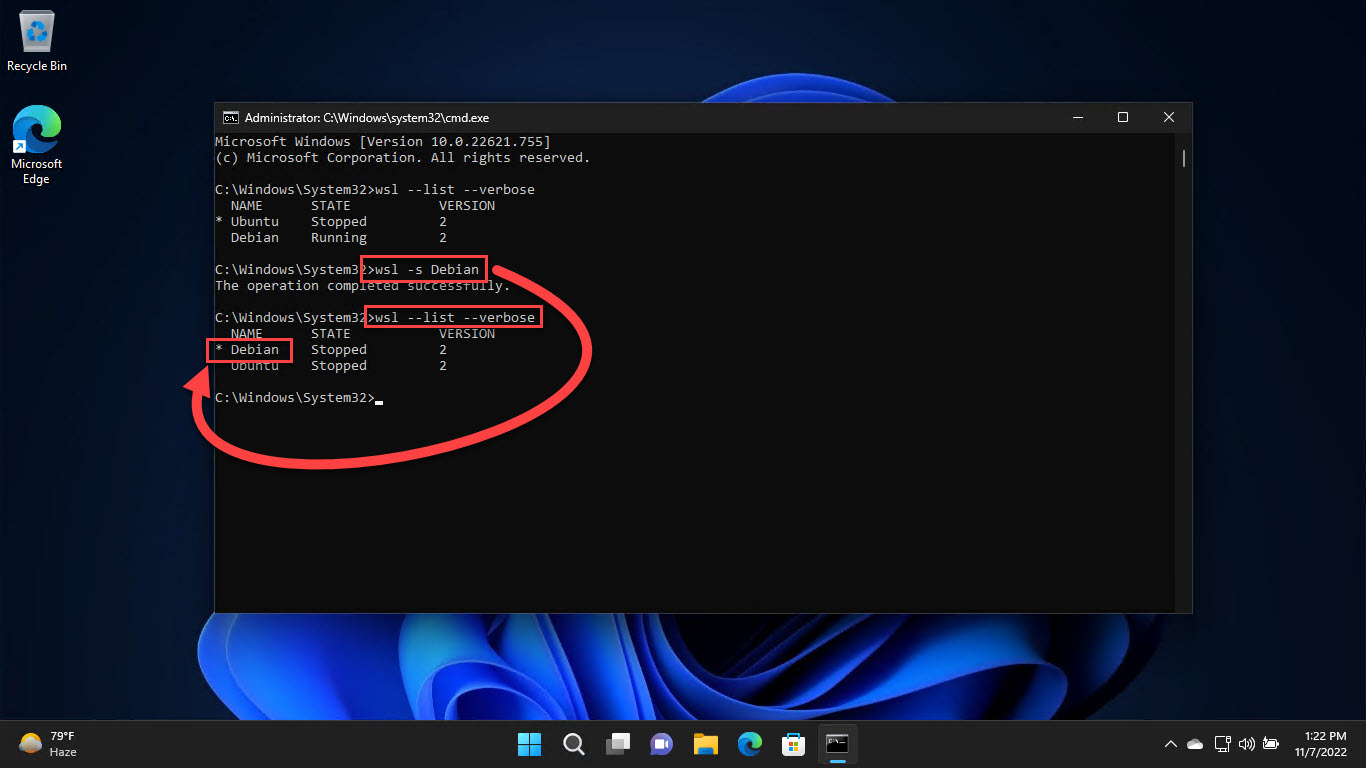
Change the default WSL distro.
Uninstall a Distro
1. Unregister/remove: wsl --unregister <DistroName>
2. Or uninstall the distro app from Settings > Apps.
3. To remove WSL itself, turn off the Windows features in Optional Features.
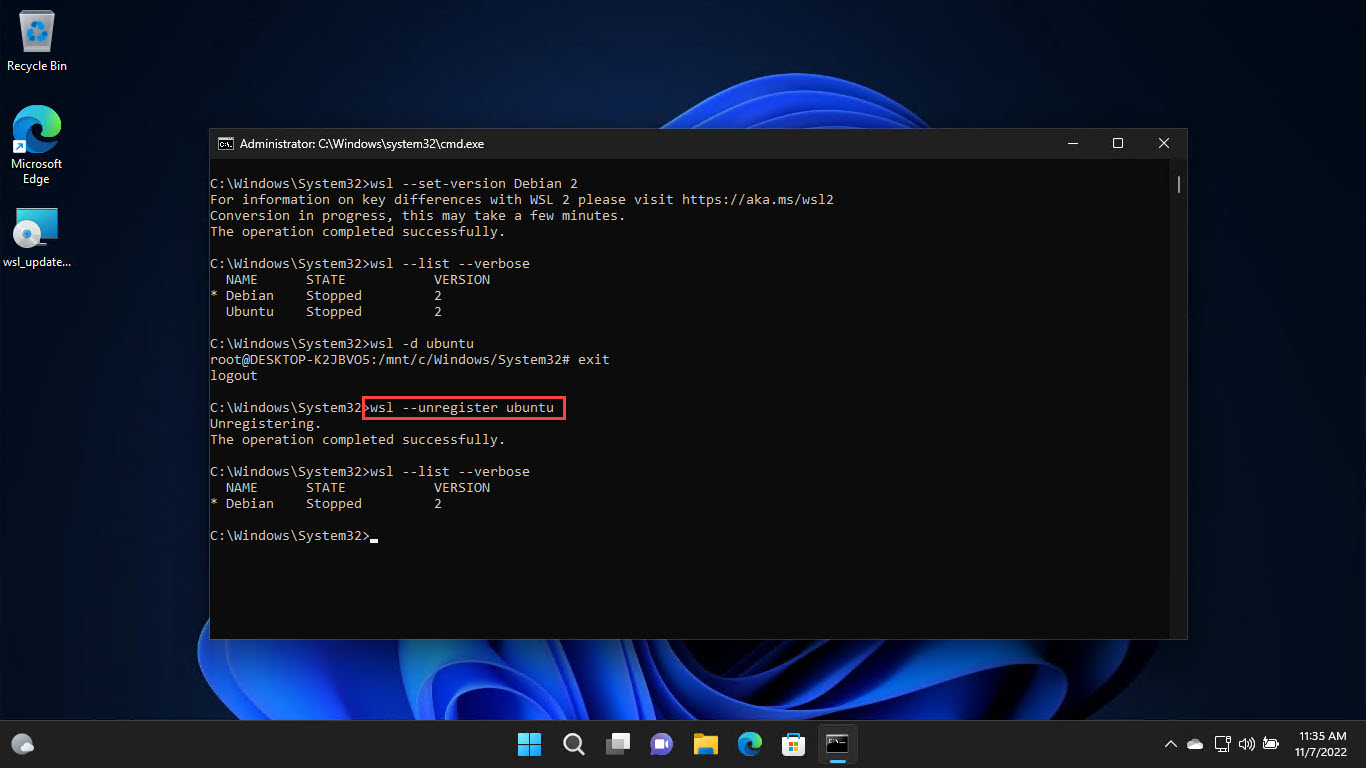
Uninstall a Linux distro.
Troubleshooting
Problem: "wsl --install" not recognised.
Solution: Update Windows, or use the manual feature-enable steps for older builds.
Problem: "WSL 2 requires an update to its kernel component".
Solution: Run wsl --update, or install the kernel update package from Microsoft’s official site.
Problem: Virtualization error.
Solution: Enable virtualization (VT-x/AMD-V) in BIOS/UEFI and ensure the Virtual Machine Platform feature is on.
Problem: Distro stuck on WSL1.
Solution: Convert it with wsl --set-version <DistroName> 2.
Conclusion
On modern Windows, "wsl --install" sets up WSL2 in one command; older builds just need a few features and the kernel update. Once installed, you can run, switch, and remove Linux distros easily — a powerful Linux environment right inside Windows.
</w:pBdr><w:spacing w:before="220" w:after="40"/></w:pPr><w:r><w:rPr><w:b/><w:bCs/><w:color w:val="0B5394"/><w:sz w:val="21"/><w:szCs w:val="21"/><w:rFonts w:ascii="Calibri" w:cs="Calibri" w:eastAsia="Calibri" w:hAnsi="Calibri"/></w:rPr><w:t xml:space="preserve">About TechHub
This guide is part of the TechHub Knowledge Base. For more step-by-step IT guides and support, visit techhub.com.lk.